Tuesday, December 29, 2009

Utthita Parsvakonasana (extended side angle pose)

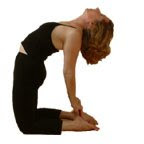
Let’s open the side body, strengthening the thigh, knee and ankle muscles. In addition, you can reduce the fat around the waist and hips with this pose, helpful during this holiday season. It can also help relieve sciatic and arthritic pains. The full expression of the pose places the palm flat on the floor outside the leg to achieve the fullest opening. There are several variations and we present two variations: arm on knee and using a block. If you are new to the pose, start with the arm on knee variation, then progress to the block variation, and then try the full expression once your side body feels ready.


Full Expression


  • Inhale bend your knees and jump or step your right foot back 4 to 4 1/2 feet.

  • Exhale your right hand to the floor on the outside of your right foot. Keep your right knee directly over your right ankle and in line with your right sit bone. Your right thighbone is parallel to the floor. Avoiding sinking through the right hip.

  • Inhale the left arm up extended over your head. Your back leg is long, strong and straight. Keep lifting the arch of the back foot. Rotate your left ribs towards the ceiling, press your right knee into your right arm and extend through the left side of your body. Energy moving is from waist to fingertips and from waist to outer edge of your left foot. Opposing forces of energy on the left side of the body create this pose known as extended side stretch. As you extend through the left fingertips, to position your neck correctly, pull your nose into your armpit. Then create space between your left shoulder and left ear by pulling your armpit away from your nose. Without moving your neck, take your gaze to your left hand. Keep pressing your right knee into your right arm as leverage to open the left ribs towards the ceiling. Visualize an extended line from waist to fingertips and waist to outer edge of back foot. Hold for 5 Ujjayi breaths. ** Note ** Students often compromise their alignment in this pose for depth. When this happens they lose the direct alignment of right sit bone to the right knee and the left ribs are unable to make the rotation up towards the sky. If you are practicing full pose and you are feeling this mis-alignment, start high and in proper alignment and move from here into full pose.

  • Inhale coming up with straight arms and straight spine. Use breath and bandhas.

  • Exhale and switch your feet and move into the left side. Keep your left knee directly over your left ankle and in line with your left hip. Your left thighbone is parallel to the floor. Avoid sinking through the left hip.

  • Inhale the right arm up extended over your head. Your back leg is long, strong and straight. Keep the arch in your back foot. Open your belly towards the ceiling so that the ribs start to open up. Your right shoulder is down and away from your ear, gaze palm of hand. Keep pressing your left knee into your left arm as leverage to open your belly. Visualize an extended line from waist to fingertips and waist to back foot. Hold for 5 Ujjayi breaths.

  • Inhale and come up slowly with straight arms and straight spine using breath and bandhas.


Variation with Arm on Knee


  • Inhale bend your knees and jump or step your right foot back 4 to 4 1/2 feet.

  • Exhale your right forearm to your right knee. Keep your right knee directly over your right ankle and in line with your right sit bone. Your right thighbone is parallel to the floor. Avoiding sinking through the right hip.

  • Inhale the left arm up extended over your head. Your back leg is long, strong and straight. Keep lifting the arch of the back foot. Rotate your left ribs towards the ceiling, Energy is moving from waist to fingertips and from waist to outer edge of your left foot. Opposing forces of energy on the left side of the body create this pose known as extended side stretch. As you extend through the left fingertips, to position your neck correctly, pull your nose into your armpit. Then create space between your left shoulder and left ear by pulling your armpit away from your nose. Without moving your neck, take your gaze to your left hand. Keep opening the left ribs towards the ceiling. Visualize an extended line from waist to fingertips and waist to outer edge of back foot. Hold for 5 Ujjayi breaths.

  • Inhale coming up with arms outstretched. Use breath and bandhas.
    Exhale and switch your feet and move into the left side. Keep your left knee directly over your left ankle and in line with your left hip. Your left thighbone is parallel to the floor. Avoid sinking through the left hip.

  • Inhale the right arm up extended over your head. Your back leg is long, strong and straight. Keep the arch in your back foot. Open your belly towards the ceiling so that the ribs start to open up. Your right shoulder is down and away from your ear, gaze palm of hand. Keep your left knee and left hip in line. Visualize an extended line from waist to fingertips and waist to back foot. Hold for 5 Ujjayi breaths.

  • Inhale and come up slowly with straight arms and straight spine using breath and bandhas.


Variation with Block


  • Inhale bend your knees and jump or step your right foot back 4 to 4 1/2 feet.

  • Place your block on the floor outside your right foot. Exhale your right hand to the block. Keep your right knee directly over your right ankle and in line with your right sit bone. Your right thighbone is working to be parallel to the floor. Avoiding sinking through the right hip.

  • Inhale the left arm up extended over your head. Your back leg is long, strong and straight. Keep lifting the arch of the back foot. Rotate your left ribs towards the ceiling, press your right knee into your right arm and extend through the left side of your body. Energy is moving from waist to fingertips and from waist to outer edge of your left foot. Opposing forces of energy on the left side of the body create this pose known as extended side stretch. As you extend through the left fingertips, to position your neck correctly, pull your nose into your armpit. Then create space between your left shoulder and left ear by pulling your armpit away from your nose. Without moving your neck, take your gaze to your left hand. Keep pressing your right knee into your right arm as leverage to open the left ribs towards the ceiling. Visualize an extended line from waist to fingertips and waist to outer edge of back foot. Hold for 5 Ujjayi breaths.

  • Inhale coming up with straight arms and straight spine. Use breath and bandhas.

  • Switch your feet and place your block outside your left foot. Exhale your left hand to the block. Keep your left knee directly over your left ankle and in line with your left hip. Your left thighbone is parallel to the floor. Avoid sinking through the left hip.

  • Inhale the right arm up extended over your head. Your back leg is long, strong and straight. Keep the arch in your back foot. Open your belly towards the ceiling so that the ribs start to open up. Your right shoulder is down and away from your ear, gaze palm of hand. Keep pressing your left knee into your left arm as leverage to open your belly. Visualize an extended line from waist to fingertips and waist to back foot. Hold for 5 Ujjayi breaths.

  • Inhale and come up slowly with straight arms and straight spine using breath and bandhas.

Better Yoga Poses

As the year winds down and a new year begins, I find myself contemplating the nature of the concept to practice a yoga pose in the “correct way”. As a practitioner in a Mysore Ashtanga class, I have on more than one occasion observed or been the recipient of an adjustment by the teacher that is accompanied by the words “a better way to do this” or even “the correct way to do this.” When this opportunity to adjust my practice in a specific way occurs, I try to assess my own body, mind, and energy level at the moment as to whether or not it is a better for me. As a teacher, it is important for me to guide my students to listen to their own bodies when given an instruction and to determine if they need to do a variation that better suits them. I try to encourage my students to try easier and glide through their practice. Find a variation of the pose that feels good, use props as needed, and push gently to a comfortable edge. Forget looking at the person next to you or across the room who can easily move themselves into the full expression of the pose. Of course, there are wrong ways to do yoga poses that can cause injury at a specific time or over the course of repetitive practice. These are corrections that are important for yoga teachers to notice and to guide their students to understand and change. For instance, in Utthita Parsvakonasana (extended side angle pose), you can place the palm of your hand flat on the floor on the outside of the bent leg. Some may not be able to place the palm flat on the floor and so they bend their hand with just the fingers on the floor. Over time, this can overstretch the tendons in the hand causing stress and injury. It is better to use the fingertips or to make a fist placing the flat space between the second and third joints on the floor or to use a block.

There is also the challenge that each style or lineage of yoga (Ashtanga, Iyengar, Bikram, etc…) has its own guidance on the specifics of the full expression of a yoga pose. In addition, each teacher through their own personal and teaching experiences may find adaptive nuances that they develop as a teaching preference. For instance, an example is the differences in instruction for a simple squat. One approach is to instruct the student to have his toes and feet in a straight ahead parallel position with heels down. For some students, this works for them anatomically and if they have not had any knee injuries. For many students, it is better to keep their toes and knees in alignment which is easier on their knees and simpler to put the heels down. One of my favorite differences is whether or not your toes are pointed or flexed in a pose. In Utthita Hasta Padangusthasana D (standing extended hand to toe pose), I have been trained by my Ashtanga yoga teacher that you can point or flex your toe. However, I have been told by some Ashtanga yoga teachers to point the toe and some to flex the toe. Obviously, there are some different muscles engaging, however, every time I am instructed on a specific direction on pointing or flexing, I find myself smiling and adjusting to the instruction.

The full expression of a pose is beautiful to observe and is an expression to help guide the direction of one’s practice. However, for many of us, due to previous injuries, anatomical uniqueness, or age, we may never achieve the full expression of the pose. It’s not the goal to achieve the full expression of a pose, it’s the journey. Learning to understand ourselves, discipline ourselves, and find balance between us and the world are key events in our journey. Uniting our mind, body, and spirit is a learning process and because each of us is unique, our journey will be unique. Better yoga poses come from a practitioner’s growing awareness of themselves. Listen to your internal guidance and make your own recipe.

Monday, November 23, 2009

Virabhadrasana II to Utthita Trikonasana Flow (Warrior II to Triangle Flow)


I found through my personal and teaching experience that this flow can help energize you and open the body laterally. My students have often commented that they would like “to do this in class more regularly”. Warrior II strengthens and tones the leg and abdominal muscles. It also creates flexibility in the leg and back muscles, and develops poise, confidence and endurance. Triangle Pose strengthens the legs, feet, ankles, knees and chest. It opens tight hips and stretches the lateral muscles along the spine and side body.

You can repeat the flow 2-5 repetitions. Let’s break down the steps for this wonderful flow:

Begin in Samasthiti.

Now, inhale, bend your knees, and jump or step your right foot back 4 to 4 1/2 feet (about one leg's length distance apart). Your right foot points directly to the back of your mat and the left foot turns in 45-degrees. Bring both arms shoulder high parallel to the floor with your palms facing down. You can flip your palms to the ceiling to get your shoulders to go back and down. Then keep your shoulders back and down as you turn your palms back to the floor.


Exhale lower your right knee down over your ankle. Right knee is over the right ankle at a 90-degree angle with strength in the back leg. Look over your right fingertips. Your spine is straight from tailbone to top of head. Hold for 1-5 breaths. ** Note ** to practice the correct alignment of Warrior Pose II, we focus on a straight spine from tailbone to top of head. To practice this correctly open your hips to the long edge of your practice mat. If there are neglected muscles in the hips that are holding you back from a straight spine, release the depth of the lunge and work with opening the hips first. Remember that alignment is more important the depth. As we learn how to hold our hips correctly, we can then practice moving into full pose.


Inhale push straight up by straightening your bent leg.


Exhale through the hips reaching the right hand out and then down to your foot or shin. Your left hip comes slightly around. Extend the left arm up to the sky. Your shoulders roll back, keep your neck long, tuck in your chin, and there is a slight rotation of your left ribs towards the sky. You should feel the lateral muscles supporting and lengthening your spine, tailbone to top of head. We are trying to create a straight spine and take it parallel to the floor. Avoid arching your spine. For this to happen there has to be a movement through the hips, where the left hip pushes to the back of the mat and rotates slightly forward to the long edge of the mat. There is a deep crease forming at the right hip and a straight spine extends out of this foundation. If you were against a wall, your shoulders and tailbone would be touching the wall. Hold for 1-5 breaths.

Inhale come up slowly with straight arms and straight spine. Switch your feet.

Exhale; go right down to the other side in Warrior II pose by bending your left knee. Look over your left fingertips. Your left knee is over the left ankle with a straight spine. The back leg is strong and straight. Hold for 1-5 breaths.

Inhale push straight up by straightening your bent leg.

Exhale; move into the Triangle pose on the left side. Remember, it's a shift through the hips that takes you into pose and not an arching of the spine. Extend your right arm up to the sky. Your shoulders roll back, keep your neck long, tuck in your chin, and slightly rotate your torso. You should feel the lateral muscles along your spine lengthening. Hold for 1-5 breaths.

Inhale; as you come up slowly arms outstretched by pushing straight up and straighten your bent leg.

Exhale back foot to front foot. Samasthiti. Now repeat the flow as desired.

Commentary on Healthcare and Aparigraha

The debate about America’s health and the state of America’s health insurance system continues to make headlines. Our own experience has been one of surprise and frustration. Our company has a small group plan whose premiums were increased this year by 25.6%. The breakdown of the percentage increase was quite revealing, 9.31% is due to a “medical trend factor” and 14.91% is due to the group getting one year older. That’s right; the insurance company is increasing our group rate by almost 15% just because we are a year older. No significant illnesses in the group over the last year, just a year older.

Now, our group can live a healthy life style watching what we eat, meditating, and practicing yoga daily, but we cannot do anything about getting older. This made us think about the public health care debate including how to control the cost of health care and to ensure coverage. We add our voices that something needs to be done. Perhaps what is being legislated is not the ultimate solution, but getting started with legislation that will help control the cost of health care and to ensure coverage, providing all Americans with options is important and must be done now.

Why now? Assuming the intention of our current health provider is to continue to raise our premiums for every year we get older and beginning with an average of $300 for an individual policy, then in ten years the premium for just getting older will increase from $300 to $1214 a month. If the rate of increase includes the “medical trend factor” (25%), then it will increase from $300 to $2794 a month. We don’t know many people whose income is increasing by 25% a year, so having health care increase at that rate is devastating. What will the increase be if someone actually gets sick?

The last yama (discipline, restraint, attitude, behavior) is aparigraha. Parigraha means “to take” or “to seize”. Aparigraha therefore means something like “not seizing the opportunity”. T.K.V. Desikachar states that aparigraha means to take only what is necessary and not to take advantage of a situation. From a personal perspective, we shouldn’t take more than what we have earned because if we do, we are exploiting someone. From a business perspective, like that of the health care industry, aparigraha could be interpreted to mean that there must be a balance between profit and benefiting a broader community, our society. One way that balance could be achieved is by not exploiting Americans who want to maintain their health, get treatment when necessary, and still live a responsible and reasonable life. We hope that the concept of aparigraha can be understood and practiced by not only individuals, but by legislatures and businesses.

Wednesday, September 30, 2009

Salamba Sarvangasana – Whole Body Pose (Shoulder Stand)

I went with a friend to her yoga class today and while I was in Salamba Sarvangasana I began to reflect on the pose and its benefits. Salamba Sarvangasana is known as the Mother of asanas. The translation begins with “alamba” which means a prop or support. Combined with “sa”, which means together or accompanied by, Salamba means supported or propped up. Sarvanga is the combination of “sarva” which means all, whole, entire, or complete and “anga” which means limb or body. The name “whole body pose” is appropriate since the whole body benefits from this pose.

The ancient sages bestowed upon the world a pose that strives to achieve harmony and happiness in our human system, just like a mother endeavors to have a harmonious and happy home. It has been spoken of it as a “panacea for most common ailments”. The thyroid and parathyroid glands in the neck region are stimulated so that they function properly and help to balance and develop the body and brain. The pose increases circulation of blood and lymphatic fluid around the neck and chest which can help people who suffer breathlessness, palpitations, asthma, bronchitis, and throat ailments. It can help to soothe nerves and ease headaches and colds. Insomnia and constipation can be relieved. If you regularly practice Salamba Sarvangasana you can feel renewed vigor and strength as the energy flows in your body and your mind. People who suffer from high blood pressure however, should not do this pose.

As I came out of shoulder stand, I experienced that sense of balance and energy flow that I have often told my students about in class. I was at peace, happy, and energized for my day. It was a fabulous reflection of how each pose we do in our yoga practice brings benefits to our body, our mind, and our spirit.

Below are some variations of Salamba Sarvangasana. If you have not practiced this pose before, be sure to get some direction from a yoga teacher who can help you find a beginning variation that is suitable and who can then help you to progress through other variations to whatever expression of the pose is best for you.

Friday, August 7, 2009

True Spirituality

This single sentence by Sogyal Rinpoche expresses so clearly our inner connectedness to all living things. Please take a moment and read it over a few times and absorb its meaning.


"True spirituality is to be aware that if we are interdependent with everything and everyone else, even our smallest, least significant thought, word, and action have real consequences throughout the universe."


Monday, July 27, 2009

Leave Your Ego At The Door


Leaving your ego at the door is a lesson that can’t be stressed enough because your ego can be very subtle. One of my favorite classes to take as a student is a Mysore Ashtanga Yoga class. A Mysore class is not led by a teacher who instructs the class as a group, but rather the teacher moves around the room helping each student individually by giving verbal instructions and giving physical adjustments. As a student, you practice the Ashtanga sequence at your pace with your own pose expressions, and you get more one-on-one attention from the teacher. I especially enjoy receiving the gentle physical adjustments in Downward Dog and forward bends.

When I do Ashtanga yoga, many of the poses I practice are variations from the full expressions of the pose. One pose in particular I have always varied in some form. That pose is Supta Kurmasana or Sleeping Tortoise Pose. I love this pose in its many variations because it tones the spine, creates energy, and refreshes the mind. The full expression of this pose has your feet crossed behind your head as in the pose presented here:

FULL Expression


The full expression is for people with very open hips, hamstrings, shoulders, and lower backs. My openness in these areas varies day by day, just like my students. The most common expression I practice is where I begin to draw my feet together with my hands laying open face behind me. While doing this expression I can wiggle my feet closer together on days when my hips, hamstrings and back are more open or I can wiggle my hands up to catch a strap across my back when my shoulders feel ready. Sometimes a block under my feet can take me a bit deeper. These variations are show here:


Supta Kurmasana Variations


It is important to be aware of how your body is feeling and your breath is a great indicator of how your body is doing. There are practices where your breath is so in sync with your movements that you feel like you can extend yourself in some poses beyond what you might normally do. These are the times to be especially mindful about your subtle ego. All my injuries practicing yoga have involved that subtle ego which lures you into a place of pushing yourself potentially beyond your edge. My own personal example is Supta Kurmasana. My teacher has often helped me to position my feet together. I was feeling very strong, relaxed and in sync with my breath one day. As I wiggled my feet together I stopped short of where I would normally position my feet. My teacher began to help me as I indicated with a smile that some assistance would be good because my subtle ego wanted to go farther. She helped me gently as I requested and moved by feet not too far, but my left hamstring and lower back responded with a spasm and strain. I nursed my injury for two weeks with gentle yoga, relaxation, swimming, and walking. We learn from our mistakes, but it made we wonder how many times I must learn to leave my ego at the door.

I encourage everyone to not be attached to how far they can get into a full expression of a pose and to let go of poses they may not be comfortable doing at all. It doesn’t matter whether you can pretzel yourself into a pose or push yourself all the way to your edge. It’s about uniting your mind, body, and spirit. The only requirements are to act and be attentive to your actions. You will find that yoga not only provides physical benefits without full expression of poses, but it can calm your mind, increase your concentration, and give you the ability to cope with stress. It is a system for your personal development that promotes physical and spiritual well-being.


Remember, you must begin yoga from where you are every day and your point of departure will always be different. So set you starting point based on your condition at the present moment, make your yoga practice sensible and well structured, and construct a gradual and intelligent course for your practice. There is no competition in yoga; there is only where you are, where you are going and where you will be. Be sure to leave your ego at the door!

Sunday, March 15, 2009

March 2009 yGuide Yoga Newsletter


Spring is beginning to make its presence known with daffodils, tulips and trees blooming! Depending on where you live, you are seeing evidence of spring. Here in Atlanta, about three weeks ago, I saw the first daffodils on my morning walk. I was having some challenges all winter getting up and getting my day started. So with the happy thoughts of spring, I started to make sure I began my day with a small routine of breath work and stretching to get my digestion, mind and body fired up for the day. I am performing this routine whether or not I do vigorous yoga, relaxing yoga, or some other physical activities.


Here is this simple practice which has really helped me get my day started:


Agnisara Kriya Sequence
Repeat this sequence 3 or more times.


1. Agnisara Kriya – 1 round of 9 full breaths
2. Uttanasana – standing forward bend breathing 5 full breaths
3. Malasana – squat with hands in prayer for 5 full breaths
4. Uttanasana – transition to standing

Kapalbhati Sequence
Repeat this sequence 3 or more times.


1. Kapalbhati pranayama for 108 breaths. I start with my palms open, counting 20 breaths at a time. Each time I reach a count of twenty I bring my thumb and one finger together starting with my pinkie. The last count of twenty is will all fingers and my thumb touching. When I end that count of twenty I open my palm and do 8 breaths. This has been an easy way for me to count my breaths.
2. Sukhasana with forward extension for 5 full breaths.


For step by step instructions of the poses mentioned in the above sequences, please click here to view a PDF file.
Visit us for our March Madness Sale and save 10% on orders over $16 thru 3/31/2009, www.yoga-software.com.

Sunday, January 11, 2009

January 2009 yGuide Yoga Newsletter

Introduction

December is just a blur and I find myself amazed that it is already January 10, 2009. Time really does just fly by! I hope you all had a wonderful holiday season. The start of the New Year always makes me think about going back to basics as I reflect on various aspects of my life. One practice flow I am always drawn to at this time of year is the Ancient Tibetan Rites. This practice helps me to bring back my balance after the rush, too much food and travel of the holiday season. I have included some brief instructions and a link to a PDF of the flow below. Also, learn about Aromatic Neti Salt and the use of essential oils in jala neti from a paper I researched and wrote in December.

Table of Contents

1. Ancient Tibetan Rites
2. Aromatic Neti Salt from Into The Scented Garden

Ancient Tibetan Rites

The Great Yoga Poses II collection includes the Five Ancient Tibetan Rites. The rites are a five-pose yoga sequence that is based on observations of a British army officer, Colonel Bradford (an assumed name), when he was living in a Himalayan monastery. The rites are now famous and are practiced around the world as they are said to be "the fountain of youth" for their anti-aging properties. LINK TO PDF

Principles

The five rites consist of different movements synchronized with your breath, to stimulate and balance the seven principal energy centers in your body. We know these energy centers in yoga as chakras. You can think of the chakras as being energy centers with a spinning vortex. As you balance the spinning of the vortex, your life force becomes more directed and stronger. The rites are designed to normalize the speed of each chakra’s spinning, so that they are spinning at the same rate and are working in harmony with one another, thus improving our health and aging process. The rites do help our bodies as we stretch our muscles and joints, and improve overall muscle tone. However, the focus of the rites is on our energy centers.

Medical research can support the benefits of the rites with convincing evidence that the aging process is tied to hormone regulation. The rites are said to normalize the hormonal imbalances in the body and therefore they hold the secret to lasting youth, health and vitality. The rites stimulate our energy system to get the energy moving from our core outward to our extremities. The theory is that your kundalini (spiritual energy) is stored at the base of your spine and that the five rites enable us to access that energy in an easy and efficient manner.

Key points to remember as you practice the Ancient Tibetan Rites:
  • Start with 3 repetitions of each exercise and gradually increase the number over time.
  • Perform each exercise up to 21 times, as the Tibetans believe the number 21 is a perfect, mystical number. According to the Tibetans, doing more that 21 times can cause the rites to lose effectiveness.
    The routine can take from 10-20 minutes.
  • Do it daily if you can. It is a great way to warm up for other yoga poses.
  • You should never feel exhausted. If you begin to lose your breath that it is an indication that you are low on oxygen and should slow down.
    Maintain an emphasis on synchronizing your breath with your movement, not on speed or number of repetitions.
  • Have fun!

Contraindications If you have any of the following conditions, consult your medical professional before practicing the rites:

Chronic fatigue syndrome
Multiple Sclerosis
Dizziness
Neck pain
Enlarged heart
Parkinson’s or other Parkinson-like disease
Heart disease
Pregnancy
Heart valve problem
Seizure disorders
High blood pressure
Ulcers
Lower back pain
Vertigo
Meniere's disease
Weakness, stiffness or pain in the shoulders or legs


If you have any questions as to whether or not you should practice these rites, consult your medical professional.


LINK TO PDF


The Ancient Tibetan Rites are included in our Great Yoga Poses II Collection. Click here to view the collection.

Aromatic Neti Salt from Into The Scented Garden


Recently, I wrote a term paper for a college course I was taking on “Plants, We Eat, Drink and Smoke Them”. The assignment was to interview and write about a business that produced products that used plants. I immediately thought about a product I use every day, Into the Scented Garden Aromatic Neti Salt. Conveniently, I was visiting in California and I had the opportunity to visit Into the Scented Garden and interview the owner, Dorothy Severns. The interview provided insight on what inspired her to create Aromatic Salt for jala neti and the process she went through to determine what essentials oils should be in the aromatic blend. This is a product that I am passion about, because it has helped me so much with my own allergies and keeping me healthier with my frequent air travel. If you wonder about jala neti and how you can enhance its benefits, read my paper by clicking here.


Click here to view the Aromatic Neti Salt products.